Elder Care in Greenwood, IN
 Permanent clothing dyes, however, can be messy and may even burn delicate skin it touches. This version uses unsweetened drink mixes as a simple, non-toxic alternative that produces lovely colors without the risk.
You may want to do this project outside to make any spills even easier to handle. Get your children in on the fun for lasting family memories, or put together all of the supplies so they can create their own vibrant clothing creations with their elderly health care services provider.
What You’ll Need
White T-shirt, tank top, nightgown or other article of clothing. Nylon or wool blends hold on to the colors the best, but natural cotton works well, too
- Several different flavors of unsweetened drink mixes such as Kool-Aid to create a range of colors
- White vinegar
- Individual bowls for each color of “dye”
- Large quantity of rubber bands
- Plastic gloves for each person
- Clothesline
- Clothespins
- Iron
- Clean white cloth
- Spoons
- 1/4 cup salt
What to Do
• Mix each packet of drink mix with 1 ounce of white vinegar in an individual bowl and stir with a spoon until completely dissolved. For darker colors on the final product, use 1 1/2 to 2 packets of drink mix
• Twist various areas of the shirt and secure each with a rubber band. Make sure a portion of the fabric is gathered above the rubber band. This is what you will dip into the different colors of dye
• Remember that the larger the portion of shirt you gather, the larger the area of color will be in the final product
• Wear gloves to keep your hands from changing colors while creating your shirts
• For best results, use one color at a time and allow the shirt to dry completely between colors. This prevents bleeding, which results in muddled brown areas
• Dip each section into the desired dye, using various different colors as desired to create unique patterns
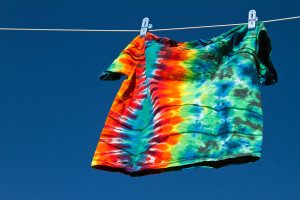
• Leave the rubber bands in place and hang the shirts from the clothesline to let them dry in the sun
• Once the shirts are totally dry, iron them with medium-high heat, using the clean white cloth between the iron and the shirt. This sets the colors
• Wait a full 24 hours after ironing to completely set the colors
• Remove the rubber bands and wash the shirts, adding the salt to the water
• Dry the shirts and they are ready to wear
As you get more comfortable with the process of creating tie-dyed shirts you can get creative and try some more advanced patterns such as these:
• V. Fold the shirt in half vertically. Trace a line from the shoulder diagonally to the center of the fold. Fold the shirt accordion-style down this line and bind it in one or more areas to produce areas to dye
• Spiral. Pleat a section of fabric into a bundle around a central point and then gather the fabric around this pleating, securing with rubber bands ever few layers. Dip different areas into different colors of dye
• Ripples. Trace a horizontal line across the desired area of the shirt. Gather several inches of the shirt on either side of this line and roll to create a “lump” along the line. Fold this lump into a ripple pattern, like a slithering snake. Secure each bump of the ripple with a rubber band and dye.
The professionals at Great Care are available to talk with you and your family about all of your home care needs. Great Care is a non medical in-home care agency providing quality and affordable elder care in Greenwood, IN and the surrounding areas. Call (317) 595-9933 for more information.
Follow Us!